As a multimedia artist, my hands stay busy creating for others. I spend a large part of my time making things I designed for other people to enjoy. But if you think none of the things I create for sale are inspired by things I made for me...
![he[art], by artist Renée Parker](https://blogger.googleusercontent.com/img/a/AVvXsEgONWMhHgH3BRfuHhwrAquTvLm35QM4Fi1X0Ynyxy0RnUb0I5Hc7Y3C-17yVjYdU1ROx01RoP2UTNIObhV0DLN27eORfLQIo9PzGvowvaxOml5nXCgs-HxeFBnEDBxQGPhcO0yYKD5qs8wrfdBLr7nY1sOKjEO5AxFdw6wQPASHIvv5EBNFVp411AmFBEI=s1456)
Showing posts with label Things I Make for Me. Show all posts
Showing posts with label Things I Make for Me. Show all posts
Wednesday, November 12, 2025
Tuesday, August 12, 2025
Tuesday Things I Make for Me
Today's (short) post is here simply to clear up and clarify a question you may have had for me or other artists you may have encountered.
Tuesday, June 25, 2024
Tuesday [Things I Make for Me]
It happened. I'm surprised that I evaded it this long. Time and time again, I have been regaled with others' horror stories. And my own experience lived up to the grave descriptions.
Tuesday, February 6, 2024
Things I Make for Me: Glasses Wall
As a creative person, I often find myself falling into DIY projects for my own needs and for others. While I'm not on the level of doing things like electrical work, I can do a mean faux stone wall, make a lamp, or set up a decent home theater.
Wednesday, November 1, 2023
All [Green] Thumbs
Fair warning: this post is a little off the usual creative rails because, well, I suddenly had to tackle some things concerning my garden. Creative in its own right, but different.
I feel weird even calling it a garden
Tuesday, May 30, 2023
Tuesday, March 28, 2023
Growing Inspiration
Faster than I could count my seeds, it's spring. As I mentioned in a previous post, one of my hobbies is gardening.
Growing things and being surrounded by beauty inspires me. So for the past few years I've done my best to cultivate my green thumb (with my share of trial and error).
Monday, August 17, 2020
Monday on Target- Focusing!
The other day something made me realize that I forgot to plan. Yeah, that sounds pretty silly.
Many of us are good at setting goals and putting new things into practice, like exercise, reading, starting a garden, etc. But then we get busy and sometimes lose sight of what we meant to do and why we started.
I've had success with something that I'm sure many people dispel as "hokey", silly, or pointless. But for me, it's been effective- I've seen results. And with new developments in my personal and professional lives, it occurred to me that I was falling off in one area in particular. One that seems to affect all the other areas. My vision boards.
Friday, May 8, 2020
Pandemic Living
Recent weeks mired in the mess of a global pandemic have basically meant an upheaval of life as we know it. For some of us.
What I mean by that is that as a professional artist, introvert, (okay, add Scorpio to the list of offenses), and general homebody, the idea of staying/working/eating/exercising/existing from home is, by no means a stretch. It's actually pretty routine for me, (and many of my introverted artist friends!). Don't get me wrong, I love to explore, interact with other humans, get fresh air as much as the next person. But doing all the major things of life from home is not uncommon for me, it's sometimes preferred.
Sunday, October 8, 2017
Things I Make for Me: Nesting Instincts

What is it about a rainy Sunday at home that inspires a certain range of activities for me? Reading, relaxing, snoozing, and today, nesting.
Post late morning coffee and a few magazines, I found myself drawn to clean up and pretty up a little corner in my bedroom. This corner was already a spot that held a nightstand and a little gallery of elders. A sort of abstract family tree of parents, grands, and great grandparents, arranged in a manner loosely guided by feng shui (courtesy of Google University) to watch over and inspire me. Today I carefully disassembled most of it, cleaned and dusted, and reassembled with some additions. I was already happy with this corner, but allergies and ideas motivated me to address the state of it. Here it is now, clean and reworked.

It is still a work in progress, and I hope to find more old pictures to add.
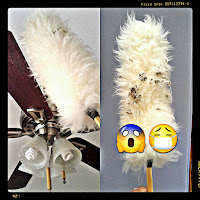
As a bonus, I had the time to clean the dust off of the ceiling fan in said room. I'm NOT lazy about cleaning, lol. In fact, the control freak in me requires that I clean throughout the week. But, like pretty much everybody else, I'm always busy.

But
home is my sanctuary, my escape. So I'm happy to have found time to
make it even more comfy. And now back to my regularly scheduled Sunday
stuff. Which, after I wrote this, involved me concocting an apple pie cinnamon roll cake thingee from my overactive imagination for my sister-in-law's birthday. So much for a lazy Sunday (what is wrong with me?), lol.

Sunday, June 19, 2016
{Sharp} Silver Linings
 |
| gaahhh!!! |
Whether it is apparent or not, it feels like I am constantly working on making progress in some aspect of my art or my business around my work. It's really an almost daily commitment for me. But sometimes things throw me off track, only to set me back down even further along than I planned. For example, about a week ago, this happened→
I was sitting at my desk in my studio editing pictures, and I kept hearing a funny tapping sound. I ignored it at first, but it kept up, so I got up to investigate. And I found that one of the two windows in my studio had somehow shattered, or buckled, or imploded- whatever. Glass dust and particles were slowly falling in.
 Good thing (and I warn you there are a number in this post) I've had enough years of mishaps that I've now trained myself to bypass the freak out and the thoughts of inconvenience, productivity setbacks, general pain in the..., etc. (at least initially). Yes, I finally learned what a waste of time and energy moaning, groaning, and getting all upset is. Instead I used the energy to quickly move things away from the window and focus on making things as safe as possible. So I dragged out the ladder I keep in my studio and rigged this up until someone could come and take a look at it.
sidenote: A few weeks back (with skepticism) I bought a roll of duct tape from the Dollar Tree store in my neighborhood.
It had a chance to prove
itself here, and it did.
Not only does it have a snazzy
print, it seemed just as strong as the
more expensive stuff. #yestothat
itself here, and it did.
Not only does it have a snazzy
print, it seemed just as strong as the
more expensive stuff. #yestothat
 |
| pardon my dust |
Later that day, a guy showed up, took measurements to have a new pane of glass made, and complimented me on my studio and my tape up job. I felt better knowing that things were moving towards a fix, and once he left, I added a tarp to catch any stray glass. I really didn't want to spend the next few weeks making bloody discoveries of tiny pieces of glass that had fallen in and on things. Once the tarp was up, and the place where my white box (that I use for picture taking) was cleared and covered in plastic, Good thing #2: (3?? I don't think I've included them all) I was able to go back to working on things that don't take place in that corner (no excuses!).
 After a few days of not being able to work in that corner, I decided to take the white box outside to try getting some pictures done. I set it up on a plastic deck chair in the sunlight, and it worked like a charm (yeah, another good thing!).
My new pane of glass was installed a couple days ago, and much of the broken glass cleared by the glazier. I still had the task of removing the plastic shield I had created, which had a bunch of scary pieces still just hanging there in it, all sharp and stabby. I finally got my mind to the task, got up on my ladder with goggles, dust mask (just short of a hazmat suit), and the long hose on my vacuum cleaner and tackled it. Once I had removed all the glass I could find, removed the tarps and all the plastic, and given the whole spot a good obsessive compulsive vacuuming, I was ready to start putting everything (especially my white box!) back, so I could get back to photos, etc. over there.
And once you start (here comes another one) something like that, it often just snowballs. And this case was no exception. So I ended up putting things back better than they were before, including some bonus cleaning and purging things I don't need any more. And now I am sitting here typing this, and looking at that corner thinking of what else I can do to make things more efficient, neat, and productive. That stupid broken window helped me fix something else! #Perspective, my friends. Perspective.
PS: It is so true, that a clean, organized work space is very inspiring (time to make some messes!)
PPS: I never figured out what broke the window. Meteor maybe?
PPPS: I got my white box years ago. You can find a similar one (plus links to other tools I use) in my tools storefront on Amazon.

Wednesday, March 4, 2015
How-To: Salvaged Paper Envelopes
Earlier today I posted a pic on Instagram of some fancy bubble mailers I made from salvaged mailers and calendars. I also mentioned having made regular letter and note card envelopes from magazine pages. Well, I wanted to share a quick (please be quick, please be quick!!!) how-to on those, for anyone who wants to make some for themselves. Here's the breakdown:
 |
| click to enlarge |
You will need:
- Templates. Find them online and print them out or pull open extra envelopes you have laying around and trace them. I like to trace them onto heavy old fiber board that I've saved from the backs of writing pads. They are a pain to cut out, but the heavier they are, the longer your templates will last.
- Glue sticks. I've used the fancy "strong" ones made by the popular brands, but, to be totally honest, the cheap ones seem to allow for pulling off and repositioning, and seem to hold best once dry. I don't like to have to go back and glue edges and corners again.
- Scissors that cut fancy edges. These are totally optional, just nice for a fancy finishing touch.
- Regular scissors.
- Salvaged magazine, catalog, calendar or other pages with colors and images you like.
- Colored printer paper.
Quick, easy steps:
a) Lay your envelope template onto a salvaged page and trace. It's best to trace onto the BACK of the page/image you want to use, so you don't have pen marks visible on your finished envelope.
b) Cut the envelope shape out of the salvaged page.
c) Use the glue stick to attach the cut out to a piece of coordinating colored paper. This will be the lining for strength and, well, style. If you want to get extra fancy, use a printer to print things (quotes, initials) onto the colored paper BEFORE gluing it to envelope cut outs.
d) Cut the envelope out of the colored paper and fold together, with the colored paper inside and the salvaged paper outside. Glue the folded in edges together. Use glue stick, tape or a seal to close the envelope.
The bubble mailers I mentioned are made similarly.

Simply snip the top edge (including used adhesive flap) off clean. Coat sides and apply salvaged paper, one side at a time, folding over wherever possible. Leave enough excess salvaged paper at the top to create a fold over flap. Trim edges after gluing paper on, if necessary. Optional: trim flap with fancy edge scissors to create a zig zag, wave, or other edge. Seal with glue stick or tape to mail. Hope that's quick, easy, and clear! Feel free to hit the share buttons and pass it on, or add your own tips, ideas, or spin on this project in comments!
Updated to add: The USPS does accept these for mail (I've mailed them!), and they do call for either printed or handwritten address labels. I recommend white paper you can tape on, or adhesive backed white labels.
Updated to add: The USPS does accept these for mail (I've mailed them!), and they do call for either printed or handwritten address labels. I recommend white paper you can tape on, or adhesive backed white labels.
Thursday, August 14, 2014
Life Hack: Cheap Luxe
 |
| One bouquet = 3 arrangements |
I love little things that come together to make a rich, happy existence, and I don't think having that kind of existence needs to be expensive. I'd like to share something I call a "life hack" that I enjoy doing from time to time.
I love having fresh flowers around, but as a self employed artist, I don't devote much of my budget (or time) to rolling in blooms everyday. When I do treat myself to flowers (or receive some as a gift), I like to max them out. Here are some examples.
Grocery stores and markets are often looked upon with disdain when people think of buying fresh flowers. But I love finding pretty blooms to take home with my groceries. Places like this will often mark down bouquets to move out the older ones and make room for fresher buds. When I'm already stopping for groceries, I cruise by to see if any of the discounted bouquets appeal to me. Sometimes I find bunches of a single type of flower. Often, they are assorted bouquets like the one I used to make the arrangements pictured (right). To make the most of whatever I have, I divide them up into several small vases or other pretty vessels. Florists recommend cutting ends prior to putting them in vases anyway, so I go ahead and pick my containers, and trim my flowers down to fit the containers. I like to pick containers that are unexpected and compliment the flowers, so for these, I used a teacup that belonged to my grandmother, a
little glass bowl, and a white ceramic bowl. I would have preferred to
use a piece of silver from my other grandmother for the roses, but I
didn't want to go searching for it, so I chose a white ceramic bowl. Here's another example of the same approach, different assortment, shown in steps:
 |
| from left (click to enlarge): BEFORE, an assortment from a florist, various small containers, screw on jar top, helpful for arranging in mason jars, water additive, trimming stems underwater (cut at an angle) |
 |
| AFTER: same flowers, sorted into mini arrangements |
I often group like flowers together for visual impact. I try to find ways to use most of the pieces in a bouquet, including the leaves, which helps each arrangement look lush and plentiful. Here's an arrangement I did in an old glass jar I saved after I used up the candle inside:
 |
| An empty candle jar, repurposed |
If I'm using glass or crystal, I will sometimes use leaves, small fruit (like cumquats), or glass gems inside the container to hide the stems and make the arrangement look extra fancy. When I've finished arranging them, I add a little of the fertilizer packet that usually comes with the flowers, to the water in each arrangement. Finally, I put the arrangements in various spots around the house, so it feels like I have flowers and pretty pops of color everywhere.
That's one of my favorite cheap and [I think] easy life hacks. Hope you try it, and I hope to share more of these soon!
Wednesday, March 26, 2014

Tuesday, July 23, 2013
Gnat Anymore
I don't have the time to Google it and find out for sure, but I'm pretty sure that there are absolutely no benefits to having gnats (i.e. fruitflies) on this planet. If I could have chosen the creatures that God left off his to-do list, they would make the top 3 for me. Okay that was mean. But gnats seriously annoy me. In the summertime, here in the Southern U.S., and I'm sure, many other places, they somehow appear, explode into hundreds more each day, and think that you've purchased fresh produce purely to welcome them into your home.
I, personally, got fed up with them zooming around past my ears and face, playing tag in front of my computer screen, and landing on my food. So the past few summers I have experimented with a few different concoctions found by Googling "kill the bastards"- kidding- I don't need the government knocking on my door. I just searched "getting rid of gnats", and found a bunch of variations of a basic mixture. I guess the mixture you choose could be determined by whether you have bougie gnats, country gnats, ghetto gnats, or whatever- no one mixture seemed to work for everybody who discussed their infestation online. After a bunch of trial and error, I worked out a mixture that's finally doing the trick for me. The mixtures were all simple, without hard and fast measured amounts, and the most common denominator in all of them was apple cider vinegar. Some people recommended just putting some wine out, in which the gnats start a party, get baked, and drown, but why pay good money for wine and serve it to gnats? The most typical mixture I found included the vinegar, mixed with a little dishwashing liquid (which, according to some of the posters, made the situation too slippery for the gnats to escape). The mixture is placed in a little bowl or cup out in the open. I've tried it, and it worked okay, but I basically had tiny swimming pools with one or two dead gnats in the bottom, and 4 or 5 still flying around, oblivious to the end I was trying to bring to them.

So recently, my mom gave me the idea to try adding a tiny piece of fruit, since that was their thing. That turned on a light bulb, and being tired of the messy, smelly little bowls, I decided to rig something else. I grabbed a couple of empty brown apothecary bottles from my studio. Carefully poured apple cider vinegar in, filling about half way. Then I added the dishwashing liquid, till the contents reached about three quarters full (don't fill all the way and make it easier for them to escape!). Then, I added a tiny chunk of watermelon to one, and banana to the other. Lastly, I smeared a little banana around the insides of the bottle mouths. My reasoning:
 a) they were attracted to the smell of apple cider vinegar, but maybe
the smell of the fruit they can't seem to resist will seal the deal b) dark amber bottles might be confusing to them and meant I didn't have to see dead bugs c) these little bottles were neater, better looking and not smelly like little bowls of vinegar.
a) they were attracted to the smell of apple cider vinegar, but maybe
the smell of the fruit they can't seem to resist will seal the deal b) dark amber bottles might be confusing to them and meant I didn't have to see dead bugs c) these little bottles were neater, better looking and not smelly like little bowls of vinegar. 
So I put my little bottles out, gave it a day or two, in which the gnat population seemed to dwindle, and low and behold, with a hard look at the bottles held up to the light, there was my proof. They worked! So I thought I'd share it here, where it might help someone else. Hey, I may not be able to save the world, but I got some ideas, lol.
SN:
the raffia seen in the pictures, tied around the bottle was just for
aesthetics, to make them look less like bottles of crack rock or
something. Say no to drugs. Except Claritin, if you have allergies like me.
Wednesday, May 22, 2013

Tuesday, January 29, 2013
Before and Afters
Believe me when I say that I am a total nerd. So when I tell you that I think I had to squelch a little excitement over what I'm about to share, you don't have to laugh- you already know.
Not long ago, my dad suddenly decided to gift me the monstrous Webster's New Universal Unabridged Dictionary he has had for many years. I may have had to wipe a little perspiration from my brow as I got over the surprise and excitement (go with me here, okay?) of this unexpected gift.
This is a mammoth book that I have cherished and coveted for my own library since I was a kid. Not just an epic dictionary, this thing contains the U.S. Constitution, practical business math, popular names and abbreviations, presidents and vice presidents of the U.S., foreign words and phrases, - well, let's just say everything you will ever need to know in your entire life (or a round of Jeopardy). In the age of digital access to any info we desire, this thing still rocks.
Anyway, as major as this beast is, it was definitely showing its years. The cover was a true testament to the old cliché (don't judge a book...), because it had seen better days. So prior to giving it a permanent spot among my other books, I decided to give it a minor makeover. Here's the before:
 |
| Beautiful on the inside |
 |
| keep it cheap |
And the after:
 |
| word. |
The Webster's has now officially become a part of the Renée Parker library.

Just a note: for my friends who like to borrow books and "forget" to return them (you know who you are!), this puppy is non-circulating reference, thank you very much. :o)
Thursday, October 27, 2011
Things I Make for Me
This is a "two-fer" today, because I'm sharing two things I made just for moi. I continue to stay happily busy creating things for my online shops and other outlets day in and day out, but, thankfully find time to make things for me. It is definitely part of the joy of creating. So, have a look. The first item is a sort of cork tile o' inspiration that I mounted in my bathroom. It's a fun thing that sorta took shape around something I was gifted. A friend gave me some of her late mother's collection of vintage buttons, which I knew I could find a use for, easy. They sat around for a while until I got the idea to glue my favorites onto brass tacks. From there I decided they were just too pretty for my regular bulletin boards. I also had these pretty, dark cork tiles doing nothing.

Then, finally I determined it was time to do something with these scraps of magazines I had lying around. I had torn out pieces with different makeup looks to try because I love to experiment with color, outside my studio, too, lol.

So this thing came from all that. Interestingly, that is how many projects come together for me, especially when I acquire something I love, or have a stray idea. I don't always know what things will become, but when I love them enough... and if I set them aside long enough, they find a purpose.
The other item is a fun tank top that was ridiculously cheap and easy.

The tank was under $5, and the shimmery peacock feather applique was, like, 50 cents. It took all of 10 minutes (if you don't count me moving it around to different spots on the top to decide where I wanted it) to iron it on. And it's adorable on. There you have it.
Monday, September 5, 2011
Things I Make for Me
It's true, as an artist, I spend a lot of time making things for other people. But I also find time to make things just for lil' ol me. Sometimes those things go on to be copied to sell or give as gifts, but the point is, they started out made by me especially for me :o). Here's the latest item of note:
 |
| A bunch of wool I had laying around... |
 |
| Plus a bar of soap... |
 |
| Equals a scrubby wool felted soap. |
This little bar with its new wool jacket is great for scrubbing paint, glue, etc. off of my hands when I finish a session in my studio. No, I wouldn't make this to sell- there are oodles of folks who already do, but since I knew how, and the materials were around, why not do a lil' something just for me?
Subscribe to:
Posts (Atom)